

For todays DIY #moneysavymarch offering I have a bit of a disclaimer to put out there. This is my entry into the Hilary's Blinds craft competition that is currently running on their website. They sent over a 1M x 1M piece of fabric and it's my job to get on and create something spectacular for a groovy prize.
I've chosen butterfly bunting because I think it ties in well with my room and my love of butterflies and all things shabby chic. If you'd like an alternative bunting DIY then click here for my previous offering on the bunting front.
Now this tutorial is a clean but simple one and you don't need many things. I'm doing it the frugal way with a stapler rather than a sewing machine because in the name of all things thrifty some of us may not own a big machine or might be a clutz with a needle * points at herself *. You might be thinking urgh! A stapler will make it look tacky and cheap but I think it looks rather unique and different, but I'll let you judge for yourself.
So go grab...
- Fabric of your choice
- Scissors
- Stapler
- Piece of card / paper
- Marker pen
- Ribbon of choice
- Ruler
With the marker draw a stencil of a butterfly on to the piece of paper. Now here's where you can change things up and go your own way with things. Change the butterfly to a normal triangular bunting pattern or swap things up and go for a scalloped edge square, flower or even letters- it's really free reign at this step.

Once you have your stencil drawn take the paper and use it as a guide to cut a strip of fabric out of. Since my paper was 9cm long I just used 9cm along the whole width of the fabric to cut a long strip across. I stuck to the bottom of the fabric but alternatively you can choose a region of the pattern that will look the nicest on the shapes once cut out.


If you haven't already then cut out the stencil and place it on to the fabric ready to trace over and cut out.
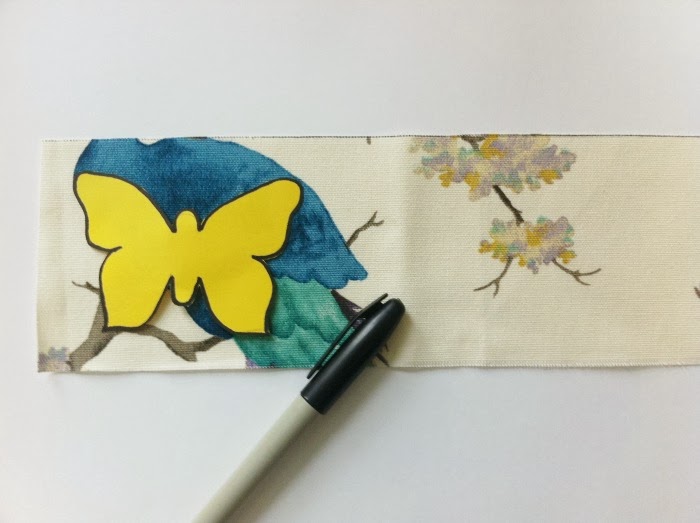
I decided to play around with the layout and put the butterfly sideways to utilize the amount of butterflies I could get out of the fabric. Do the same for whatever shape you've decided to go with. One thing to note is that you should definitely start tracing on the reverse of the fabric, unlike I've done because I later on found out the consequences of marker leftovers...

Once traced onto the fabric with the marker you can begin cutting...
Now that your done cutting just align everything ready for the stapling process. If you'd like to go the traditional route by all means just pin and sew the butterflies/shapes onto the ribbon.

This is the most 'trickiest' part in my opinion so observe carefully. Take the ribbon below the butterfly and adjust the butterfly to an angle that you want. Make sure everything is in place and then push that stapler down. It should be fine, but if you dislike the angle or want to redo it then by all means undo the staple and start again. That's the beauty of the staple. Unlike sewing it's easy to redo the alignment of one shape without having to take out the staples of all of them.


Now that's the finished product and the staples in all their glory. I actually really like the staple look but if you find them too garish and absurd then why not just invest in a sturdy hole-puncher and thread the ribbon through, rather than sewing.
I'll leave you with a bit of a montage of bunting arrangements, although I don't particularly have a picturesque view in my house to capture the true essence of the creation. Hopefully you get the gist and have a go. Don't forget to tag me @whatididwednesday with the #moneysavymarch.


No comments:
Post a Comment